FunnyPlaying FPGA GameBoy Color assembly & review
Do you like playing old handheld video games? The popularity of retro games seems to have exploded in recent years, with the Game Boy (and its iterations) in particular becoming highly sought after. There are so many retro gaming handhelds on the market these days, it feels legitimately impossible to keep track of the options. But oftentimes players still crave the authenticity of experiencing games on the original hardware.
Unfortunately the increase in demand for handheld game consoles has produced a corresponding hike in prices. Try to buy a GBA SP today—or a Game Boy Pocket or Game Boy Color—and you’re likely to be put off by the sticker shock. After all, official Game Boy models are between 20 and 35 years old at this point, so one would expect hardware scarcity to start coming into play. These gadgets are just too darn popular!
So original hardware can be expensive and software emulation isn’t always as faithful to the experience as we would like, but there’s also a third option: hardware emulation. In recent years we’ve seen products that recreate the functionality of classic game consoles at the hardware level—often using FPGA’s—enabling them to play official game cartridges just like original hardware. The MiSTer project is one example of this, and the Analogue Pocket is another.
Now the Analogue Pocket looks absolutely amazing, perhaps the ultimate Game Boy. But it’s also wildly expensive (starting at $220), with extremely limited availability. It’s essentially a luxury item for wealthy retro game enthusiasts and diehard handheld collectors, not necessarily a portable gaming device you’d put in the hands of a child. Due to its hefty price tag, the Analogue Pocket is unlikely to ever be carried in a pocket at all; destined to be used less for play, and more for display.
But hey, Analogue isn’t the only Game Boy hardware emulation game in town anymore! The folks at FunnyPlaying have their own FPGA GameBoy Color kit, and it’s way more affordable. After buying everything required, you’ll probably spend about $85. The only catch is, the FunnyPlaying GBC is a kit, meaning that you have to assemble the thing yourself.
However, don’t let that deter you. The assembly process is super easy (barely an inconvenience), and I can guide you through it. Let’s go on a Game Boy Color building journey together.
Price
The price for this product was very good, especially considering that a used Game Boy Color will run you around $75 or more. Here you get a Game Boy Color with a big, sharp, backlit screen, and a rechargeable battery using USB-C, for just around $85 (my total was $83.60).
Now sure, you do need to assemble the thing yourself. But given how painless that process is, it’s still a really good deal.
If you choose to get one of these, just be sure to order all of the parts required to complete the device. In addition to the FunnyPlaying GBC kit itself, you’ll need a GBC shell, buttons, and silicone pads for said buttons. Here are links to everything I ordered:
FPGBC kit - https://funnyplaying.com/products/fpgbc-kit
GBC shell - https://funnyplaying.com/products/fpgbc-kit?variant=40858870317117
GBC buttons - https://funnyplaying.com/products/cgb-custom-buttons?variant=39333911593021
GBC silicone pads - https://funnyplaying.com/products/gbc-replacement-silicone-pads
Once the gear arrives, you can put everything together. So I’ll go over the full assembly process below.
Ease of Setup
This project is really as simple as assembling the parts and turning it on. No soldering required, just two special screwdriver bits. For a DIY project, this is about as easy as it gets. There even are multiple videos going over the assembly process on YouTube. If you’d prefer a video reference, I recommend this one the most. Below are the steps I took to putting the FPGA GBC together.
Step 1: Test the Kit
The first step, before you start putting everything together, is to make sure your kit actually works. This involves plugging the screen, the battery, and (optionally) the speaker into the motherboard and powering it on. If you see the “FP-GBC FUNNYPLAYING” start screen, then you are good to proceed.
If you don’t see this then something might not be connected properly, or the battery might need some charging, or else your unit could be defective. Better to learn this before having to mess with any tiny screws.
Step 2: Front Shell Assembly
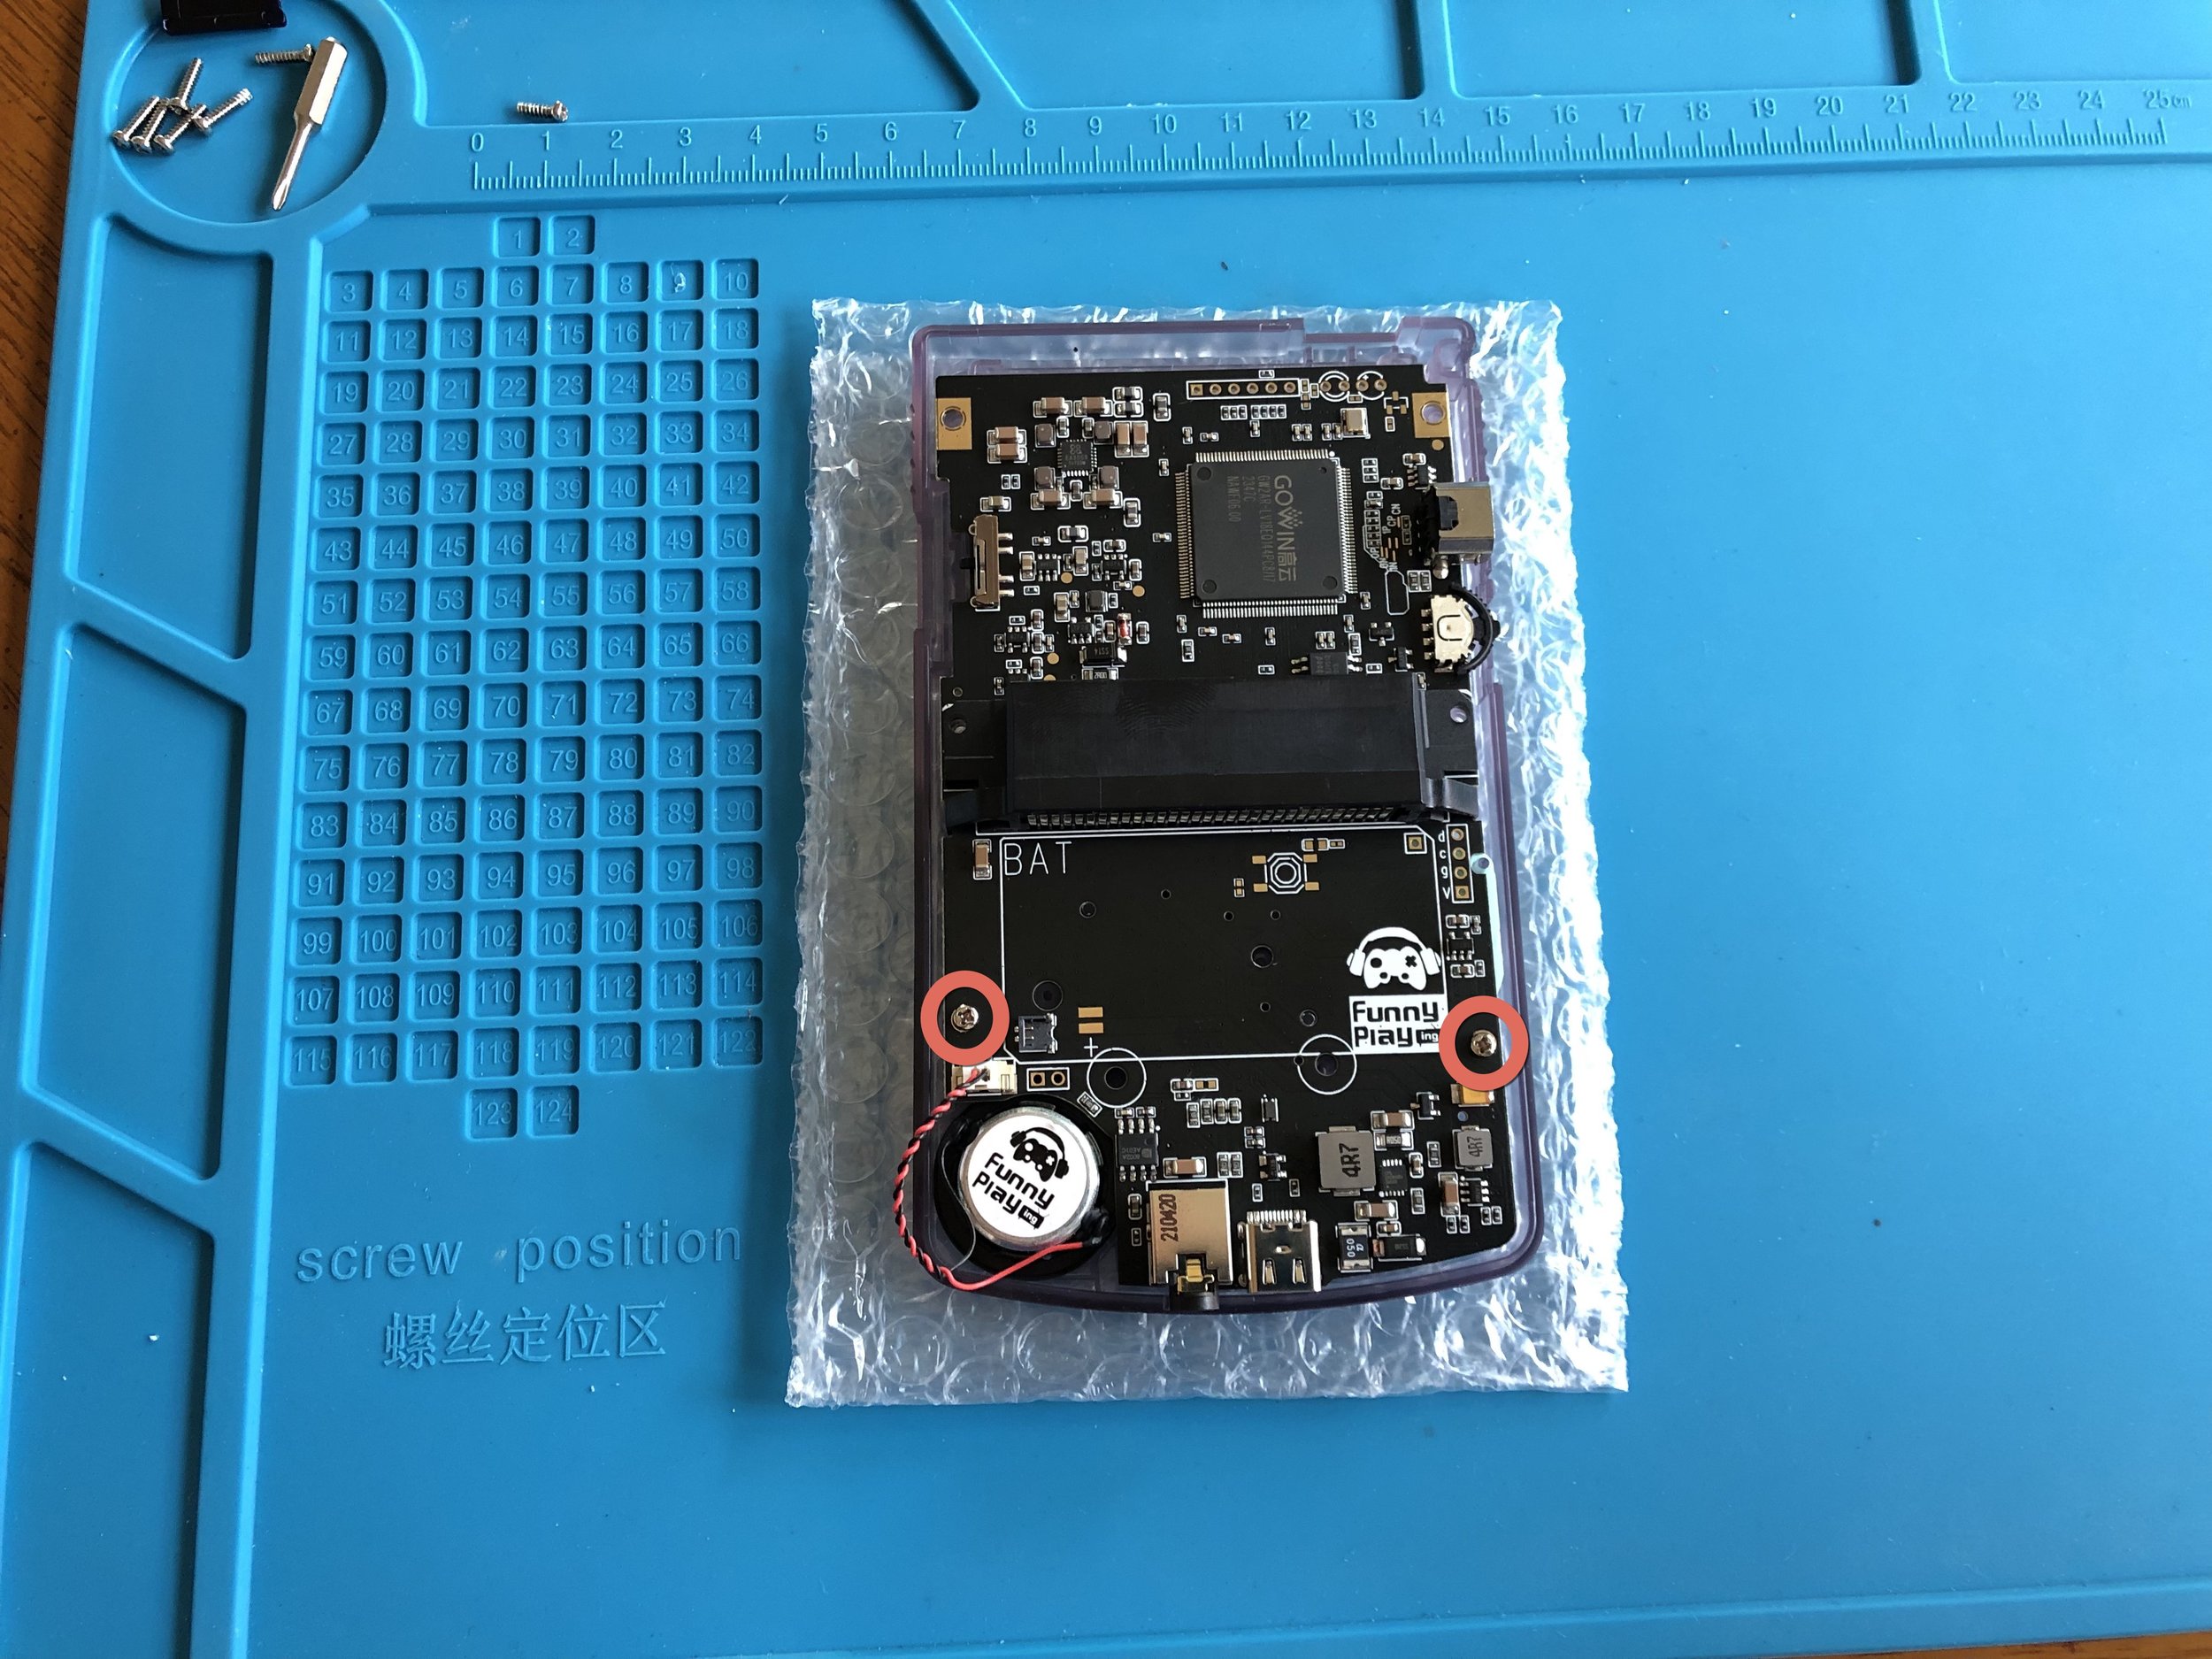
Once you’ve tested the kit, we can start with assembly. Take the front GBC shell and drop in your buttons, placing the silicone pads behind them. Connect the speaker to the motherboard (if you haven’t already), and be sure to put its little silicone gasket around its rim so the component will fit snugly in the lower corner. Drop the motherboard in place, adjusting the position of the speaker if needed. Two Phillips Head screws in the bottom half of the device will secure the motherboard in place.
At this point, I would recommend press-testing the D-Pad and face buttons a bit, just to make sure everything is seated correctly.
Step 3: Fiddly Bits
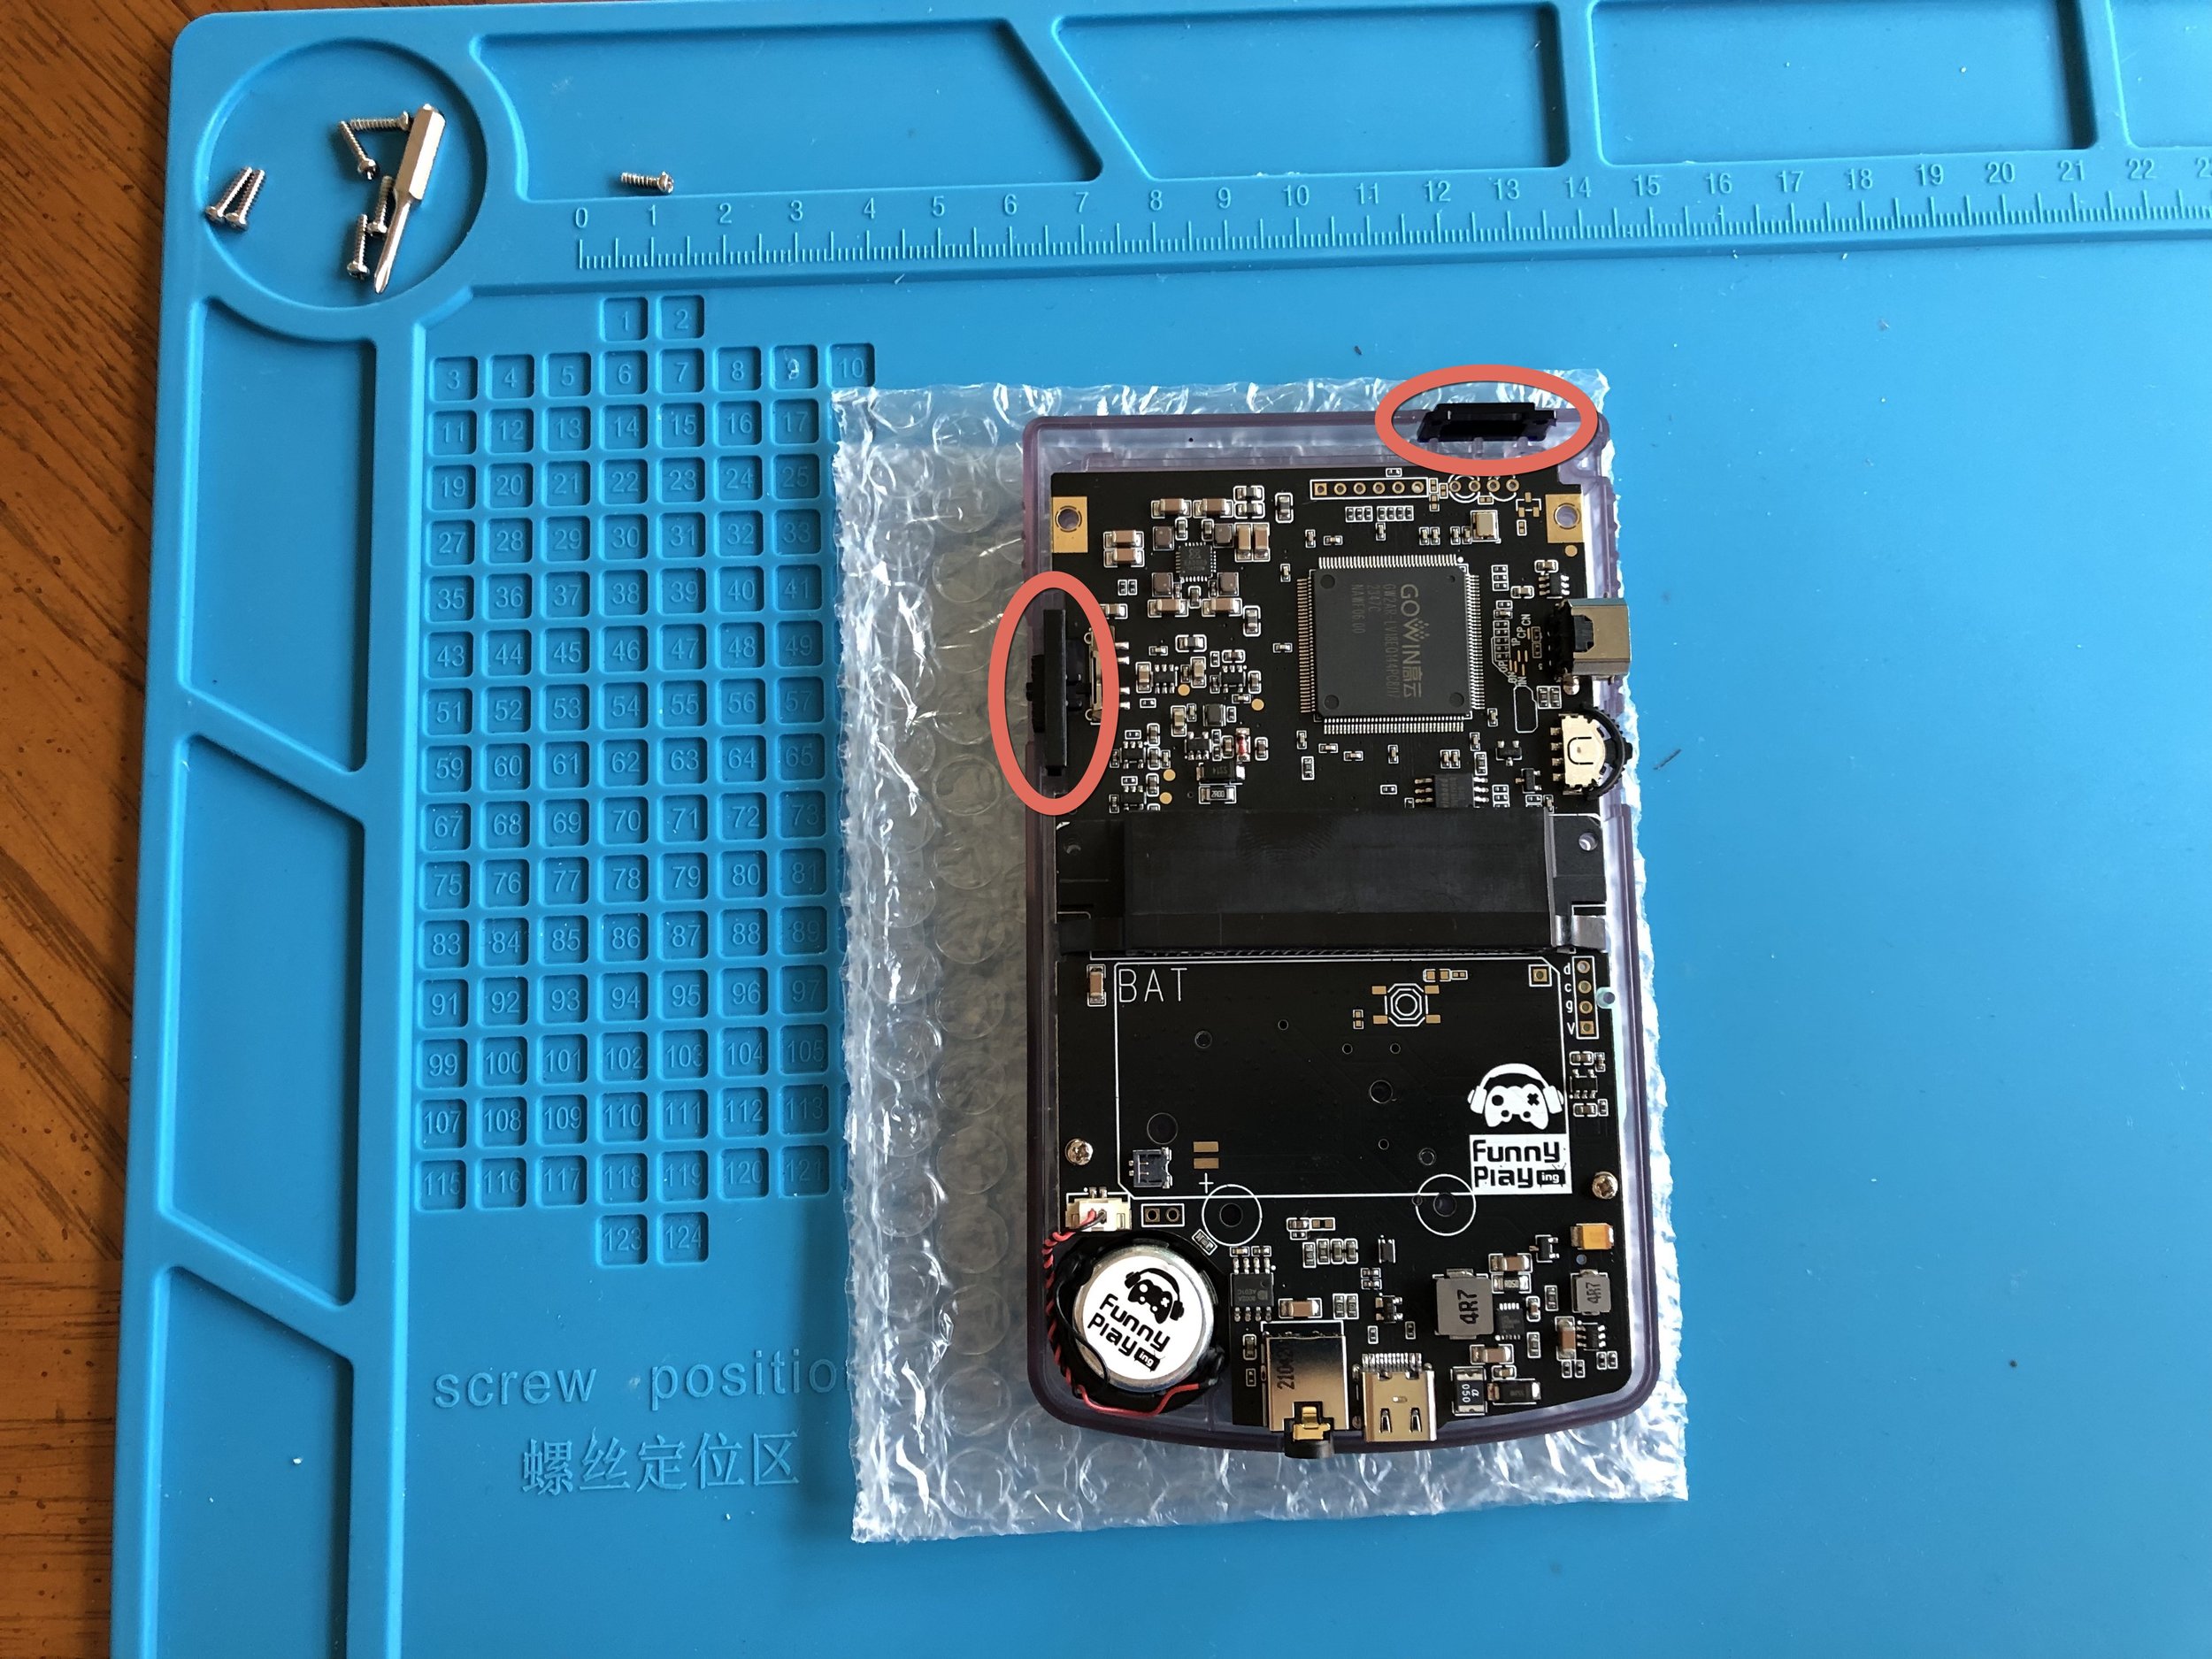
Drop in the Infrared Window at the top of the device and the Power Switch on the side.
Did you forget that the GBC had an IR port? Because I totally did.
Step 4: Back Shell Assembly
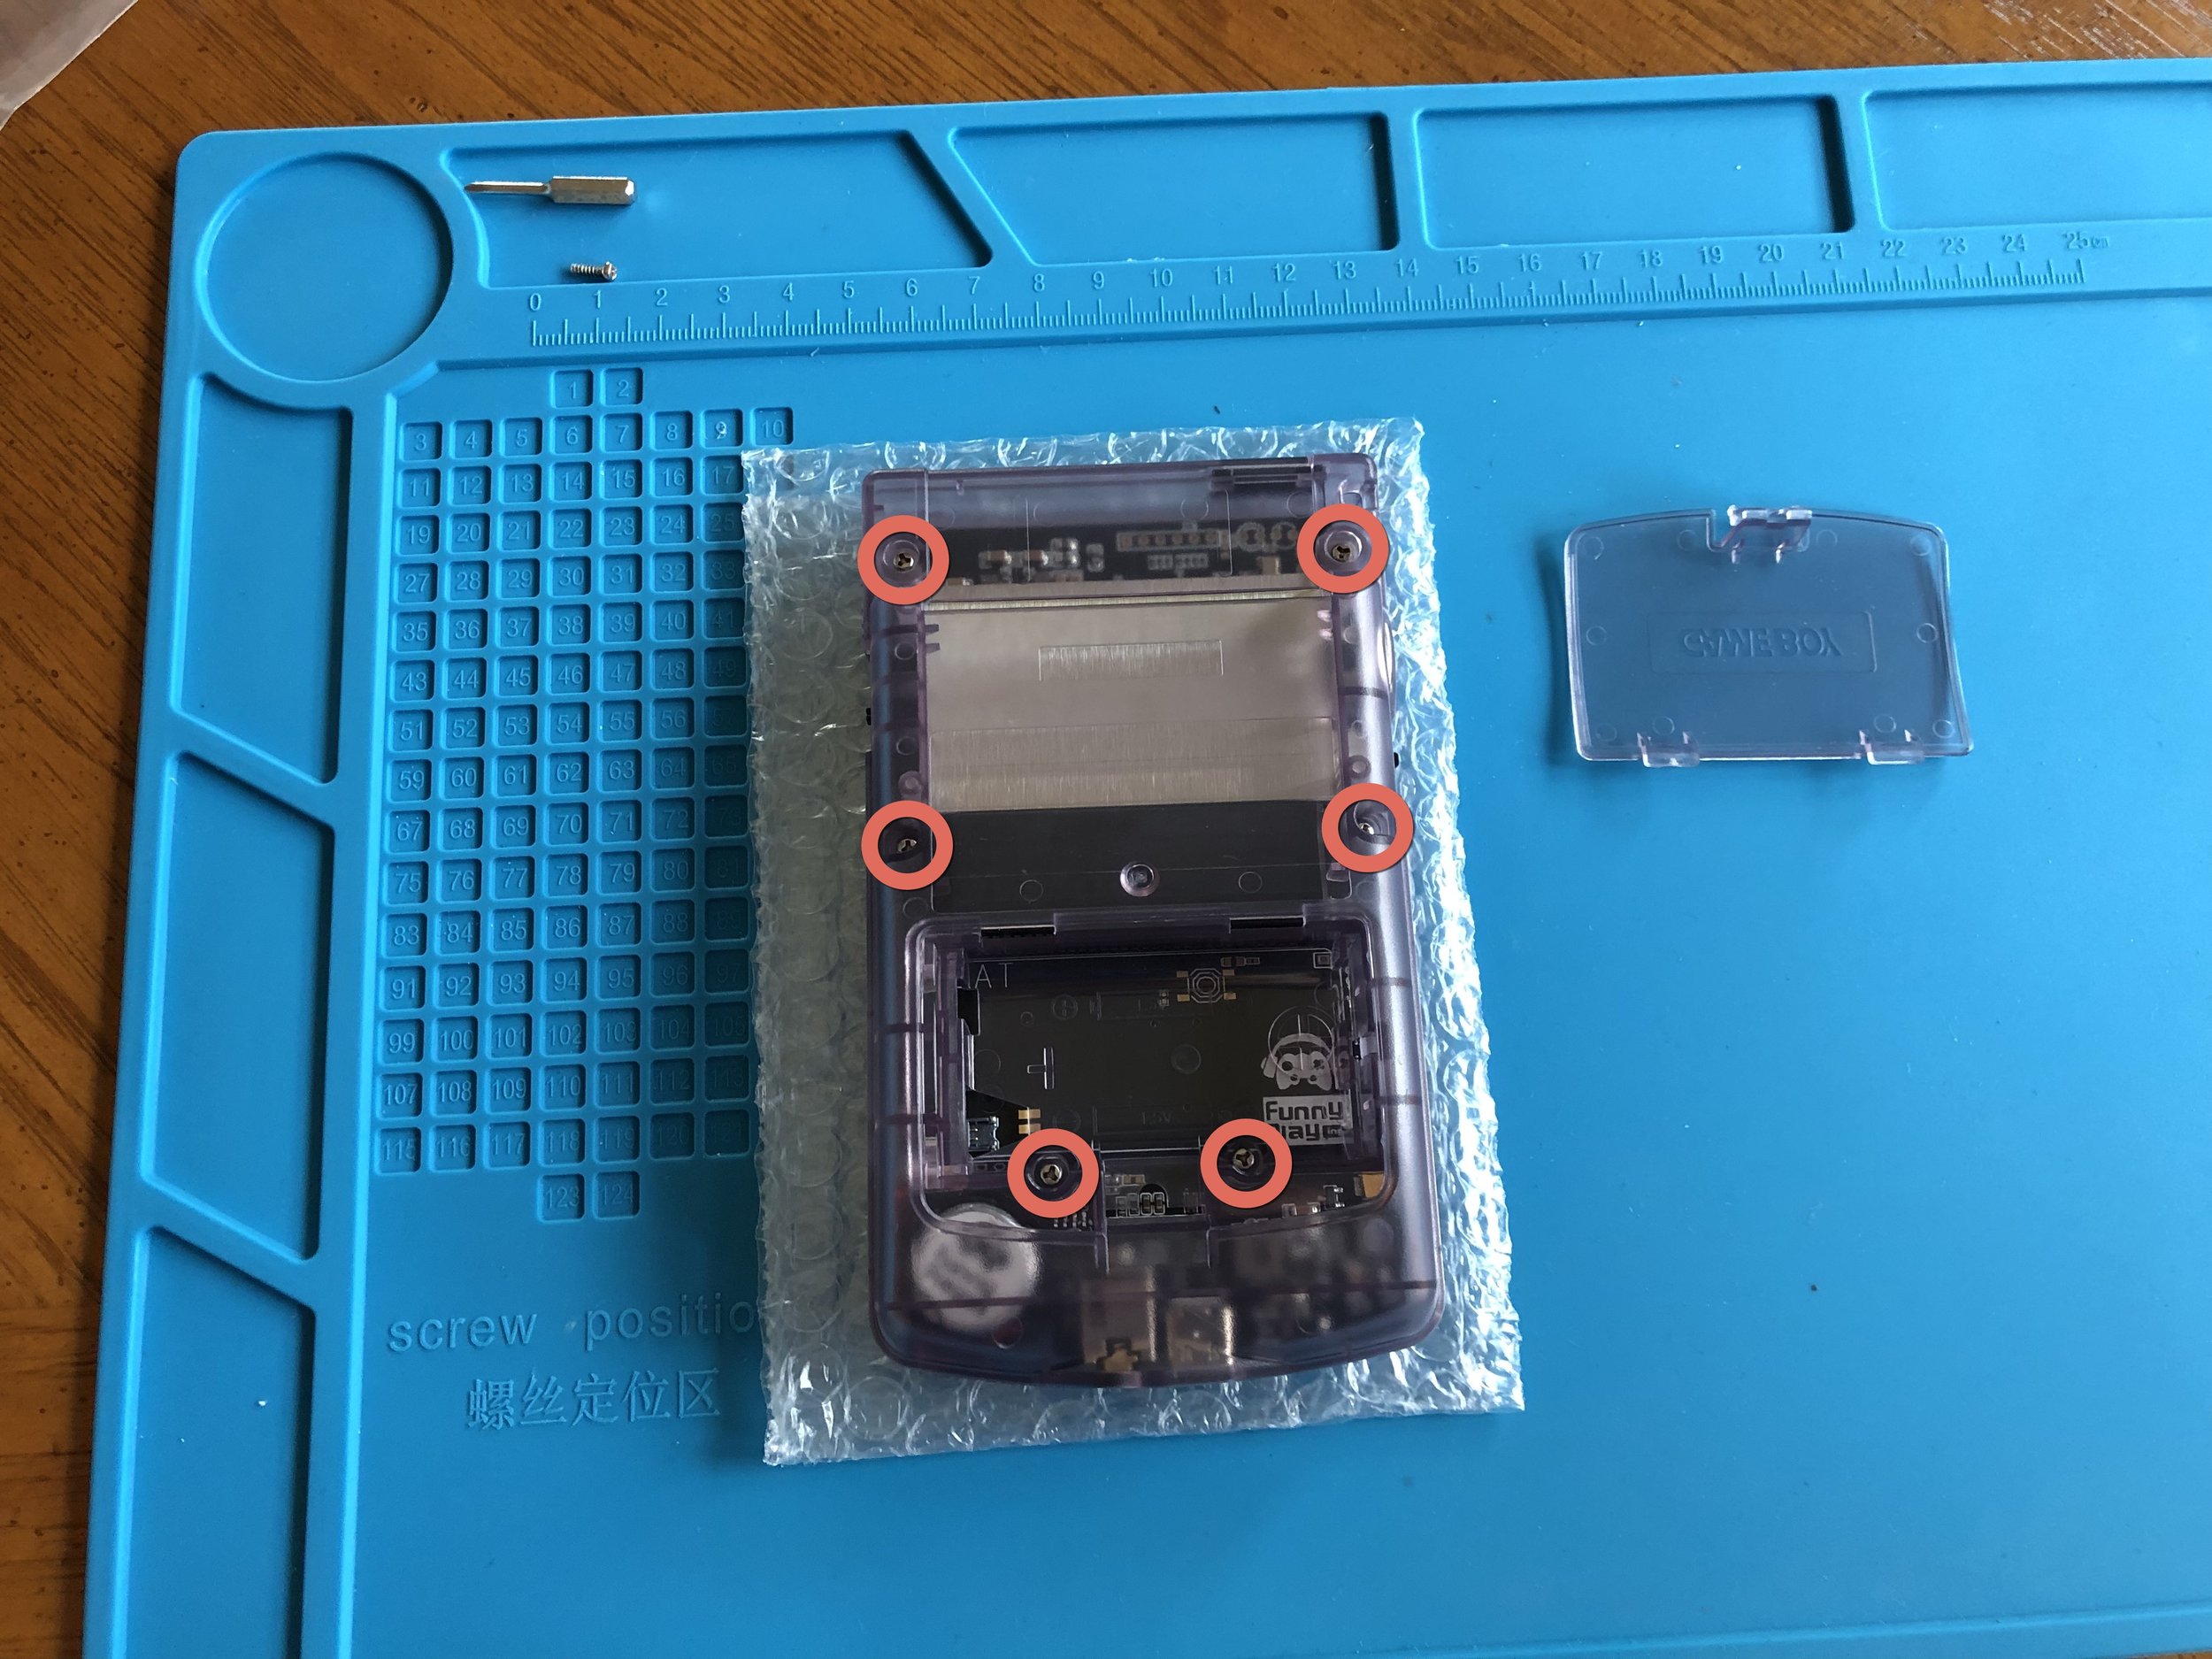
Put the back half of the GBC shell in place and secure it with six Tri-Wing screws.
This thing is starting to look like a Game Boy already!
Step 5: Battery Installation
In the battery compartment, install the rechargeable battery. If you tested the kit at the beginning, you’ll be familiar with the battery’s connector port. But just be aware that the port is very small and it can be a bit tricky to wire connected properly when having to work around the shell. Use a plastic spudger—like one included in the iFixit Toolkit—to pop it into place. Clip in the battery bay door, and we’re set.
Keep that spudger handy, because we’ll need it for the next step.
Step 6: Screen Panel Placement
Incredibly, we don’t need to reopen the GBC shell to install our screen; we can access everything right from the front of the device. Use a plastic spudger to open the bale on the ribbon cable connector, carefully slide the ribbon cable into its slot—kind in mind, these things are pretty fragile—then close the bale to lock it in place.
If you like being extra careful, now is a good time to power on the device just to make sure nothing has been damaged in the installation and the screen is still working.
Finally, peel the adhesive backing off of the screen’s edges and carefully slide it into position. Give the screen a few good presses, especially at the sides where the adhesive needs to stick, and we should be good to go. Peel the protective film off the screen and the process is complete.
If you’d like to complete the “authentic” look of your GBC, the shell comes with stickers to be placed on the back. Ironically, one of these is the 800 number for Nintendo’s support department, a number you should never dial in regards to this third-party product.
Congratulations, you now have a fully functional FPGA GameBoy Color!
Quality of Experience
Once assembled, this FPGA GameBoy Color is pretty awesome. It basically does exactly what it says on the tin: this is simply a Game Boy Color with a better screen and rechargeable battery. And frankly, that’s all you need.
The Volume Rocker will function as a button if you click it in—as opposed to rocking up or down—and this brings up the device’s options menu. This is a relatively elegant way to conveniently access options without adding more buttons to the classic device.
It’s a little unfortunate that you need to save system changes and then reset the machine in order to see those changes applied. Because if you’re experimenting with different core options, you might need to change options one at a time and you’ll be resetting over and over.
Also unfortunate, the system does not remember options you’ve selected on a per-game basis—or even on a cartridge-type basis (original Game Boy vs. Game Boy Color). This means that if you’re swapping between old-school Game Boy and Game Boy Color games fairly often—and you prefer to use the GB core for one and GBC core for the other, as I do—you’ll be making these system changes rather frequently.
That said, these are pretty minor complaints about an otherwise stellar product. You could always just leave the GBC core selected, never change a single option, and the FPGA GameBoy Color would work great for you.
This probably goes without saying… Since this is a Game Boy Color, it can play original Game Boy and Game Boy Color cartridges, but it cannot play Game Boy Advance games. That’s fairly obvious from the fact that the GBA cartridges are half the height of older GB cartridges, they clearly won’t fit. So if you’re specifically looking to play Pokémon Ruby, Sapphire, Emerald, or something newer then this isn’t the system for you. With GBC you can play only the first two generations of Pokémon games…plus the Pokémon Trading Card Game and Pokémon Pinball—which honestly kind of rules.
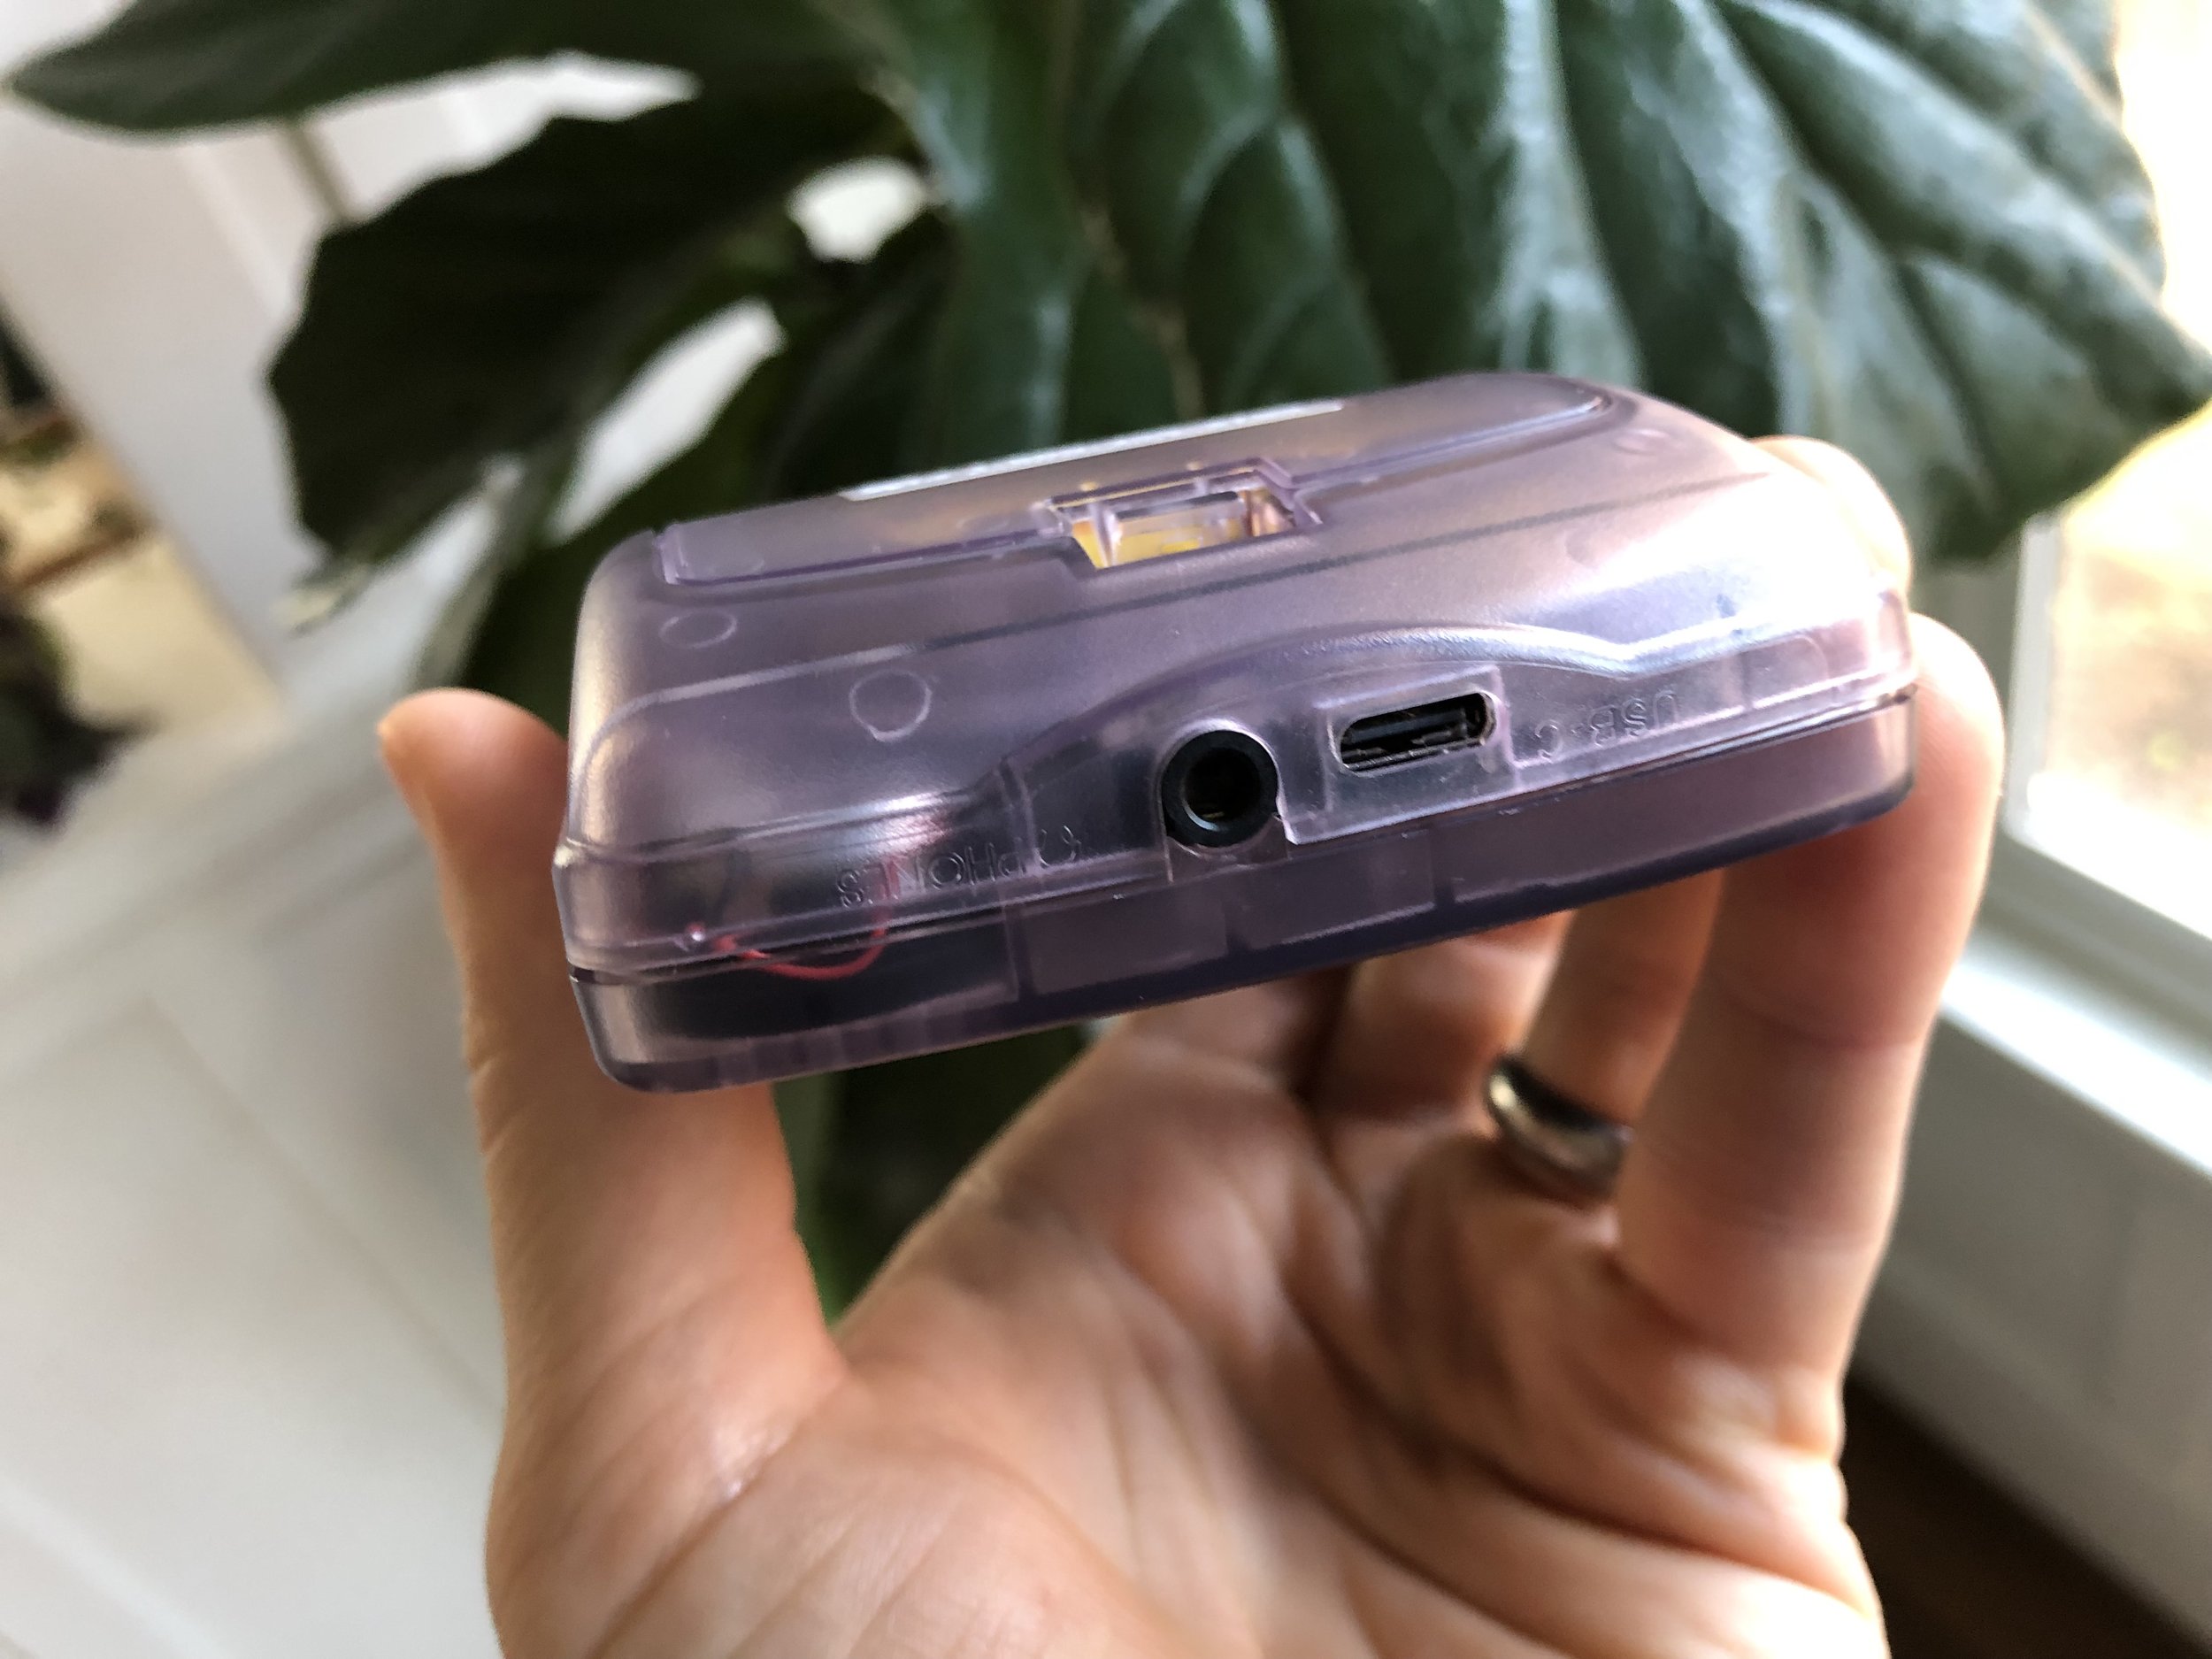
USB-C charging, so sweet!
The shell includes stickers to give your GBC that authentic 90’s look.
All in all, I am extremely satisfied with FunnyPlaying’s FPGA GameBoy Color. Whether playing GBC games or original Game Boy cartridges, this device has quickly become my No.1 preferred handheld. It’s particularly useful for busting out the Game Boy Camera, something I’ve been wanting to do for ages now. (My usual go-to would be the GBA SP, but that device orients the camera upside-down.)
If you are in the market for a Game Boy Color specifically, our recommendation would be to skip original hardware and get the FPGA GBC kit instead. It’s essentially the same thing for the same price, but with a couple “quality of life” upgrades that truly enhance the experience. Big thumbs up from us!


